Showing posts with label backyard. Show all posts

Thursday, August 13, 2015

Volunteer Sunflowers, part 3


The tale of the Sunflowers didn't end with my painting.  After the flowers were pollenated, the ray flowers shriveled and fell off and the flower heads drooped.  It would take several weeks for the seeds to finish maturing and be ready to harvest.  My plan was to harvest and dry the flower heads with the seeds intact, to later user to feed the birds.  Every few days I checked to see if they were ready to be harvested.

One day I found cracked sunflower seeds on the backs of the flower heads.  Birds had discovered the seeds and were beginning to eat them.  Over the next week I watched Gold Finches, Cardinals and Crows come to the garden and wrestle individual seeds from the flower heads.  The flowers that had fed the bees, and provided me with beautiful subjects to paint were now feeding the birds too.

Seeds were pulled from the edges first, then further towards the middle as they too matured.  The birds had to be quite acrobatic to remove the seeds, hanging over the edge of the flower, or even upside down.  Their struggles would make the flowers shake violently.


Sunday, August 2, 2015

Volunteer Sunflowers, part 2


I spent a lot of time studying the sunflowers before deciding what to paint and how to approach the painting.  In the end I decided on an off center close up of the flower with a single Bumble bee feeding.

The disc florets spiral out from the center in Fibonacci sequence.  This pattern provides the optimal number of flowers and seeds for the given space.  The pattern can be easily seen in the un-opened disc flowers at the center.  My pencil sketch included the placement of the ray flower petals and the spiral lines in the center's unopened florets.

The palette I worked with included warm and cool yellows and blues; as well as Yellow Ochre, Burnt Siena and Burnt Umber.  The whole central part of the flower would involve a lot of negative painting.  Using the cool yellow I painted the whole center of the disk.  A wash of blue and warm yellow was added the center.  Warm yellow was used for the ray floret petals around the disk.  Then working from the outer edge of the disk inwards, Burnt Sienna was add to define the spent disk flowers.  Yellow was mixed in to the Burnt Siena to lighten the color as I moved toward the center and began to define the open disk florets.  Additional colors were added to darken the spirals in the center and define the unopened florets.


Background color was added between the petals and additional shades of yellow were used to continue to define the open disk flowers.  The bee was painted.  Many additional layers of color were added to develop the background, flower and bee.


Sunday, July 26, 2015

Volunteer Sunflowers, part 1

This year I have several volunteer sunflowers growing up in the herb garden.  Some have large single flowers and others have multiple smaller flowers.  One thing they all have in common is they tower over the much shorter herbs, gently nodding in the breeze.  The herbs have small flowers that generally attract small insect pollinators.  The sunflowers, however, attract larger pollinators.  Large carpenter bees and bumble bees, in addition to the smaller honey bees and native bees are all attracted to the sunflowers.

Sunflowers (Helianthus spp.) are annuals native to North America.  Their flowers have large centers composed of many small five-petaled florets (disk flowers) that spiral toward the center.  The outer most florets resemble petals (ray flowers).  The disk flowers on the outer edge mature first, then the next row of florets, and the next, until all the florets have opened and been pollinated.   Each composite flower is a food source for days or even weeks.

The two large bees I see most often are the Impatient Bumble bee (Bombus impatiens) and the Eastern Carpenter bee (Xylocopa virginica).  Bumble bees are smaller then Carpenter bees and have a fuzzy appearance due to numerous small hairs on their abdomen and thorax.  The larger Carpenter bees have a shiny black abdomen that is hairless.  The Impatient Bumble bees yellow hair is so pale it seems white.

Carpenter Bees are considered pests because they drill into wooden fences and buildings causing structural damage.  Bumble bees, like honey bees, are beneficial insects, and are responsible for pollinating many plants including food crops.


Saturday, May 10, 2014

Daffodil still life

One of the delights of having a garden is to be able to pick flowers and bring them inside and continue to enjoy them throughout the week.  This is especially true in Spring when the weather jumps back and forth between warm and cold.

One of my favorite group of spring flowers are Daffodils.  They are bright and cheerful flowers that burst out of the slowly warming ground and bounce back from late winter snows.  They remind us winter will end and spring will return.  Picked flowers will last for days in a vase; long enough for me to find the time to sketch and paint them.

Daffodil is a common name used for bulbs in the Narcissus genus.  They are not native to the US, but have been a popular plant in gardens and parks for generations.  The common large flowered variety are often found along roads and in meadows.  They continue to thrive long after the gardens they were planted in are gone. 

The flowers have a central bowl-shaped corona, three sepals and three petals.  The flower color ranges from white through shades of yellow and orange, pink and red.  The corona and perianth can be the same color, or different colors.   There are single flowered and multi-flowered forms.  The multi-flowered forms often have small delicate flowers.  Some flowers are fragrant.

Saturday, April 5, 2014

Of whelks and snowflakes from Sapelo Island


I recently took a weekend trip to Sapelo Island, one of my favorite places in Georgia.  I was busy most of the trip working on a Friends of the Marine Institute project, but since I had taken my watercolor traveling kit with me, I did find time to sketch some Knobbed whelks (Busycon carica) that were on the window sill at the cottage we stayed in.  Outside the window in the background is a row of Snowflakes.


Snowflakes (Leucojum aestivum) are a bulb in the amaryllis family.  Their arching sprays of five to seven blooms appear in mid to late spring.  The dangling white flowers resemble small white bells with small green spots at the end of each of the six tepals.  In the south, Snowflakes are considered an heirloom plants and passed down from generation to the next.  It was introduced to Gardens in the Eastern United States by the first European settlers.  The bulbs are tough, surviving late frost and snow as well as deer and chipmunks.  The Snowflakes in my garden always remind me of spring on Sapelo Island.  This sketch to the right is a close up of Snowflake flowers blooming in my garden.

Sunday, August 4, 2013

Project Robin: fourth painting

The Robin in the third painting was much better, but due to flaws in the paper, I needed another painting.  As long as I was doing another painting I planned on some additional refinements.  I decided a less distracting and chaotic background could improve the overall composition of the painting.  I made a pencil sketch massing color areas in the background and foreground.  I used the sketch as a basis for developing an overall color pattern that would flowed across the page.  

Next I took a closer look at the leaves of the Japanese Red Maple, Acer palmatum atropurpureum, to better understand their individual and combined color ranges.  Early spring leaves are orange-red, they turn red-purple to green in summer, then back to red in the fall.  The variety of color combined with the shape of the palmate leaves make it easy to understand why these trees are so popular.  To the left is the page for the Japanese Red Maple that I added to my Tree journal.  I started the journal way back in 2011 as part of a course I took at the John C. Campbell Folk School.

Finally, I tested how the color pigments I would be using for the leaves would combine and play together.  I used what I found from these tests to decide which colors to lay down first to create the orange and green shades in the painting.

In the fourth (and final) painting all the small branch in front of the Robin were eliminated, leaving only a few small branches in the background.  I painted the Robin, nest and branches first, and then uses the same wet-on-wet technique to add one swath of color at a time, letting them run together, covering the branches and edges of the nest.  I came back and defined a few distinct leaf shapes.

The colors in the fourth painting are muted, similar to the first painting, but because the colors are massed the red-oranges create a distinct foreground and the greens push into the background framing the Robin.

Saturday, July 27, 2013

Project Robin: third painting


I wanted brighter colors and I liked how the background leaves turned out, but adding so many bright leaves in the background distracted from the rather dark and uninteresting Robin in the second painting.  It was time for a third painting.  Before doing the painting I studied Robins and worked on getting the pose of the Robin sitting in the nest.  I decided to eliminate a few more branches and also to make the nest the full height (as it was in the first painting).  I painted the Robin, nest and branches first, but did not mask them.  I then uses the same wet-on-wet technique that I used in the second painting to add in the background, but with fewer distinct leaves.  Unfortunately there was a flaw in the paper that only appeared after I had started painting the wet-on-wet background.  I finished the painting anyway, knowing a fourth painting would be needed.

Saturday, July 20, 2013

Project Robin: second painting


The small branches in front of the Robin and the seeds in the first painting were distracting, and the colors were not bright enough in some areas of the painting.  Also the nest seemed to sit on top of the branch, instead of behind it.  I quickly decided to do a second painting removing the seeds, some of the branches and making the nest shorter.  To brighten the colors I decided to use the method I learned from Margaret Walsh Best.  I painted the Robin, nest and a few branches first, masked them.  

The wet-on-wet background was added in two layers, the first was Phthalocyanine Blue and Lemon Yellow and the second was Quinacridone Rose and Cadmium Yellow.  Finally I added a few leaf shapes.  When I removed the masking from the Robin and nest it removed some of the paint and raised the paper.  When I added paint back the paper quickly absorbed it making it difficult to control how the paint spread.

Sunday, July 14, 2013

Project Robin: first painting


I've been working on a painting of a Robin for a friend's birthday.  It is based on a photo I took of a nesting Robin in our Japanese Red Maple tree (Acer palmatum atropurpureum).  I noticed the Robin's nest while using the scope to watch the Bluebirds in the Martin House.  I was looking through the branches of the Red Maple at the Martin House.  The Red Maple is a beautiful tree, it leafs out red and as the leaves mature they slowly change to green.  The progression of red to orange to yellow to green can be seen on each leaf like a reverse of fall coloration.     The Robins had made a large twig nest in the lichen covered branches of the tree, and it was framed by the multi-colored leaves of the Red Maple.

I began working on the Robin project about a month ago.  In that time I have done four paintings.  Each painting has its good points, and each was done slightly differently in an effort to improve what I didn't like in the previous painting (more on those later).  The one thing they all have in common is a palette of Quinacridone Rose, Phthalocyanine Blue, Cadmium Yellow and Lemon Yellow.

For the first painting I used the poured watercolors method I learned from Kie Johnson during a workshop earlier this year.  First I masked the Robin, nest, seeds and branches.  Then I poured Quinacridone Rose and Cadmium Yellow on the paper for the first layer.  After the paint dried I poured a second layer of Phthalocyanine Blue and Lemon Yellow.  

After the second layer dried I removed the masking and painted the Robin, nest, seeds and branches.  I used a bit of Yellow Ochre and Burnt Umber in the nest and branches.  I also added a few suggestions of leaves to the background.  

Saturday, June 29, 2013

Backyard birds

This year has been a wonderful year for bird watching in our yard.  We noticed a lot of wood chips on the patio and discovered a pair of Yellow-shafted Flickers (Colaptes auratus auratus) had decided to carve a nest cavity in the old Paper Mulberry tree outside the kitchen window.  The location gave us a great view of the Parent birds as they came and went, and later of the fast growing chicks being fed.  We were lucky enough to watch the chicks fledge, taking flight from a dead tree limb.  I took many photos but haven't done any paintings of them yet.

On the other side of the house a pair of Bluebirds had taken up residence in one of the 12 cubbies in our Martin house.  In 12 years, our Martin house had never even tempted a Purple Martin once, it had always been a condo for Purple Finches and House Sparrows.  But this year we are the proud landlords of two beautiful Bluebirds.  While we could watch the parent Bluebirds fly about the yard catching insects and eating berries, the Martin house is too high for us to easily view the interior.  We set up a spotting scope that allowed us to see dim shapes moving inside the Martin house.  I spent a morning working on a sketch of the parents feeding the chicks (upper part of the page).

We had cleaned out the Martin house once we were sure the Bluebird chicks had fledged and the parents were no longer visiting the house.  This was a bit of a task since the telescoping pole the house is on has rusted together and we couldn't lower it.  We ended up using a 12 foot ladder to climb up to the house to clean it.  But it was worth the effort, we were rewarded by having the Bluebirds build a second nest the very next day!

We have spotted the young Bluebirds from the first clutch in the yard.  They look like odd half sparrow half Bluebird birds, with blue wing and tail, but a brown stripped head and breast.  I added sketches of the parents and one of the first clutch immature Bluebirds to the lower part of the page.

Friday, June 7, 2013

Spring flowers


This spring the whole yard suddenly burst into bloom.  Purple and yellow Crocus, yellow and white Daffodils, Blue bells and white and red Lenten Rose filled the early spring with bright colors.  I kept a vase full of fresh cut flowers for many weeks, and even managed to find a little time to paint some of them.  

This was one of my attempts to create vibrant backgrounds similar to the ones Margaret Walsh Best exhibited at the Georgia State Botanical Gardens. 

The birds have also returned.  This year in addition to the Cardinals, Chickadees, Titmice, Wrens and Hummingbirds that feed and nest in our yard, blue birds moved into the Martin house and Yellow Shafted Flickers nested in an old tree in the backyard.  We have been able to watch the bluebirds come and go from the back porch, and the flickers from our kitchen window.  It has been fun to watch them all.  

Thursday, May 17, 2012

Little yellow pond flowers


This spring we noticed numerous small bright yellow flowers in our pond.  We debated what they might be, and finally got around to actually going and picking one out of the pond.  It wasn't any of the plants we thought it might be.  Instead it turned out to be a Bladderwort!  

Bladderworts are very interesting plants.  They float on the surface of the water, and their small bright yellow flowers appear on erect stems above the plants.  The plants submerged branches contain air spaces which allows the plant to float.  What is easily mistaken for roots are actually numerous submerged leaves that have small 'bladders'.  These plants are carnivorous and the bladders are used like a vacuum to trap very small aquatic animals for food.


Sunday, January 22, 2012

More spring bulbs

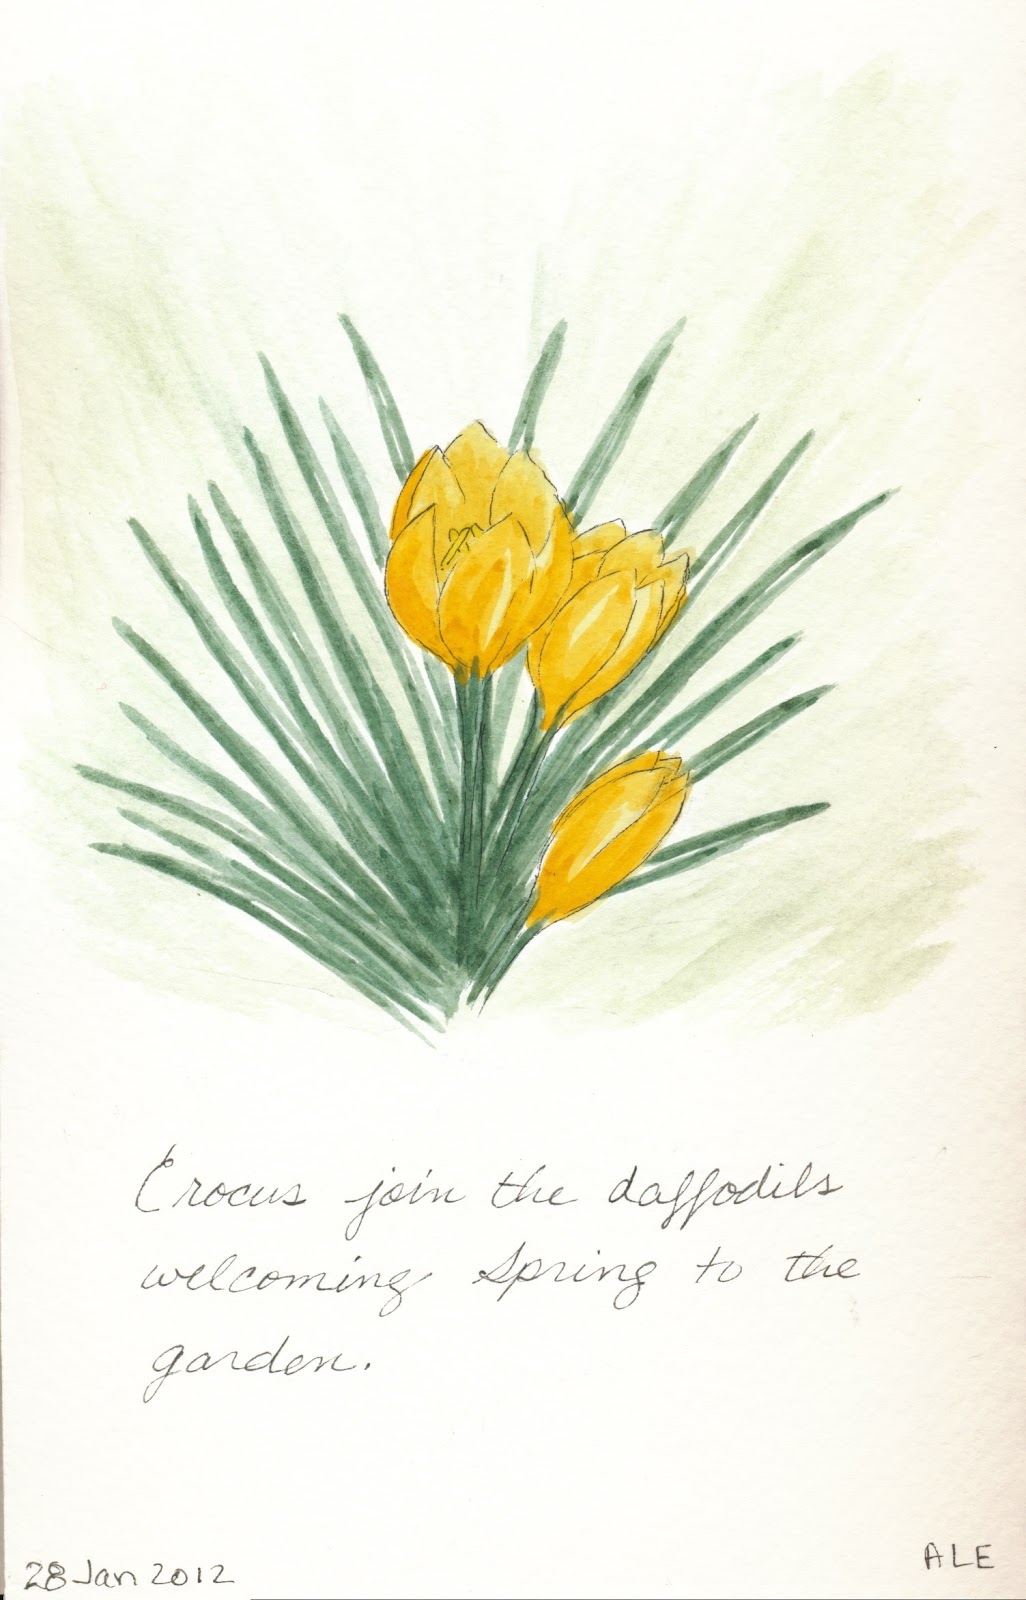
Every weekend I am checking my garden for new flowers.  Last weekend I noticed my yellow Snow Crocus  (Crocus chrysanthus) are all up!  For several years I wondered what the small clumps of thin green and white striped leaves were.  Then one year I just happened to look at the correct time and saw the flowers.  The flowers only last a few weeks and they are very short, so if your not looking carefully at the correct time you will miss them.

This weekend my large purple Crocus appeared.  I added them last year, and they ended up being planted among some Hyaciniths.  It is still too early for Hyacinth, they will come up after the crocus are done blooming.  If you look very closely you can just see a few crocus leaves in the lower left hand corner of the photo.

I also spotted some small clumps of Dwarf Crested Iris (Iris cristata) appearing around the bird bath.  There were not even leaves last weekend!  The Crocus mentioned above are also members of the Iris family.  


Sunday, January 15, 2012

Spring buds

The extended warm weather has drawn out buds on several trees and bushes.  If we have a hard frost now it will kill many of the buds and we will have fewer blooms in Spring.

Spring buds are growing out on the Cherokee Rose beneath last years thorny Rose hips.  This is the Georgia State flower.  I have only one plant, but it has grown up 15 feet into the trees and cascades back down to the ground.  When covered in white blooms it is really a sight to see.


Sunday, January 8, 2012

Winter and really early spring flowers

The temperatures this winter have fluctuated quite a lot.  Days of 30 and 40 degrees are followed by days of 60 and 70 degrees.  Then its back to the 30 and 40 degree days agai  n.  It is no wonder leaves are appearing on bushes and emerging from the ground.  The Paperwhites finished blooming soon after Christmas.  Now stalks bearing nodding clusters of  Lenten Rose and daffodils are appearing between the green foliage in the back garden.

The flowers of the Lenten Rose (Helleborus orientalis) are shades of white, pink and purple with a greenish tinge.  Instead of petals, five large colorful sepals surround a ring of smaller cup shaped petals (called nectaries).  The flowers curves downwards, as if they are looking at the ground.  It is called a "Lenten Rose" because it blooms around the time of lent.  Another species is called the "Christmas Rose" because it blooms at Christmas time.


The bright yellow flowers of the Common Daffodils (Narcissus pseudonarcissus) bloom early.  These bulbs naturalize freely and spread across the garden and lawn!  Some of the bulbs in my garden are foundlings that came from old homesteads.  Even if it snows these flowers will survive and continue to bloom.

These are both images of in-progress journal pages.  I am working out the kinks with a new computer and scanning applications.  Unfortunately the programs on my old Power PC are not supported on my new Intel based Mac.

Sunday, December 18, 2011

gargoyle among the winter flowers

Having grown up in the north, I think of winter flowers as the bulbs in pots inside that are forced to bloom for Christmas and Easter.  Having lived most of my adult live in the south, I now think of the wonderful plants that bloom outside.   One of my favorites is the Sasanqua or Christmas Camellia (Camellia sasanqua).  Most Camellias are small evergreen trees.  Our Sasanquas are sprawling unruly bushes.  Most of the year they are just part of the green background in the yard, but when they bloom they are a sight to behold.

The dark green leaves are a perfect foil for the 2 to 3 inch flowers.  The flower's numerous beautiful dark pink pedals open to reveal many bright yellow stamens and anthers.

Several plants in the Camellia genus, including Camellia sasanqua, are used to make tea.  The Sasanqua is also used for other purposes.  Its seeds contains sasanquol, also know as 'tea oil'.  It is an alcohol that has anti-inflammatory properties.

While I used the term 'gargoyle', my garden statue is actually a grotesque.  True gargoyles sit on roofs and serve as spouts for the rain water collected from the roof to be expelled from.  Our garden grotesque sits on a large granite rock that is slowly being covered by foliose lichen.  Some day he too may be covered in lichen.

Sunday, December 11, 2011

Swamp Sunflowers

Every year my gardening efforts start with cleaning up the flower beds, cutting back the old dead stalks and trimming the bushes.  But in the front garden beds this happens in late November or early December, right before we decorate the front porch and bushes with strings of lights for Christmas.

Not long after I made this sketch the flowers were gone and I was trimming back the five foot stalks.  It will be eight months before these garden giants bloom again.  

Wednesday, November 23, 2011

Backyard views

As I mentioned earlier I have a growing series of entries done from my back porch, looking out on the flowers, animals and garden sculptures.  It is an ever changing view.  I guess that is why I keep doing more.

back yard views

Sunday, November 6, 2011

Fall colors of yellow, gold and red are filling the yard.  The red leaves of the Virginia Creeper were gone within the week, while the yellow leaves of the grape still cling to the fence.  The chill wind of fall has blown the leaves off of  many bushes and trees, leaving them scattered about the lawn.  


The tall yellow swamp sunflowers are some of the last flowers of the fall.  The bright golden yellow is a contrast to the copper sculptures they share the flower bed with in the back yard.


Helianthus angustifolius, is also known as the narrow-leaved sunflower, narrow-leaf sunflower or swamp sunflower.  It is one of the fall blooming perennial flowers in my garden.  The multi-branch stems have many long thin rough and sandpapery leaves.  Over the years, individual plants have become small clumps in the flower beds.  


Their tall stalks lean toward the sun, contesting ownership of the walkway in the front yard.  They wave in the wind attracting bees and butterflies, and slowly shed their petals.

Swamp sunflowers spend the summer growing tall, taller than any other perennial in my flower beds.  When they are ready to bloom in fall most are 6 feet tall.  They are this tall even though I cut them back in Summer before the buds form.