Showing posts with label printing. Show all posts

Monday, November 1, 2021

Printed Story: workshop

FBAC on-line class The Printed Story taught by Catherine Cross Tsintzos.

In this class we each developed a story, determined a layout and design for a book, created graphics and text for the story, and completed one small accordion or pamphlet book.

Week one we worked on a theme for our story.  We discussed art books and storytelling using images and words.  To help develop the overall layout and design of our book we used storyboards.  The Storyboard was 6-8 squares: two squares for the beginning, 2-4 squares for the middle, and 2 squares for the conclusion.  Each frame included a sketch, text and notes on boarders, colors etc. 

I decided to tell the story of how we created a wildflower garden for my Mother-in-law.   
  • It starts with the field and plowing.  
  • The middle is about the plants growing.  
  • The end is about the butterflies that visit the wildflowers.


Week two we worked on relief printmaking techniques.  Because I had them already, I used Speedball water soluble inks, baren, hard brayer and linoleum cutting set.  We used thin linoleum that can easily be cut into smaller shapes.  

I used photos of the garden, flowers and insects as references for the lino stamps I carved.
Field sketch and cut lineo block

Photo and cut lineo blocks

I did several test prints to learn how to mix the 3 colors of ink to get the color I wanted (light green, oranges, browns, black).  

test printing smal lieno blocks
 
I did test prints to determine if printing the smaller blocks over the full page green field would work (i.e. would the colors show up; would the design work).

test printing flower blocks over printed green field


Week three we worked on printing and assembling the final book.

I created a cover for the pamphlet book, printed one side of the pages and let that dry for a few days, then carefully printed on the other side.  I painted backgrounds on the flowers and butterflies pages.  I added tissue paper between the pages to protect the ink.  

Cover
first and second pages with tissue paper between


Saturday, August 10, 2019

Unexpected find

We spent a long weekend Camping.  We had a nice spot under the tress that shaded our camper.  We did some hiking, swimming and star gazing.  We took the opportunity to visit nearby towns to taste some local beer and food.  We walked around town checking out some local shops.  We were not looking for anything in particular, and I was totally surprised to fined a small press.  Needles to say this heavy cast iron press came home with me. 

A copy press is a small press that can be used to apply equal pressure for a variety of bookbinding purposes.  A Copy press is similar to a nipping presses.  Copy presses were used to make copies of freshly written documents.  The fresh ink of the document was transferred to damp tissue paper using the pressure of the copy press.  The copy printed on the tissue paper is the reverse of the original document.  Tissue paper was used so the reader could read the through the paper.

I plan on using my copy press to compress book signatures and to print linocuts.  

Sunday, March 25, 2018

Printing & Books: Relief printing with linoleum blocks

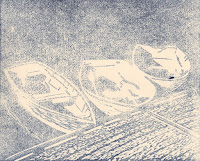
row boats in the sun
Relief prints can be made from any flat surface that can be carved, wood and linoleum being the most common.  The use of linoleum dates back to around 1913.  Linoleum is easier to carve then traditional wood blocks, requiring less expensive tools.  Unlike wood, linoleum has no grain, allowing for large areas of flat color and a greater variety of textures. 

I choose a photo I took of three row boats tied to a dock at Isle au Haute, Maine for my subject.  The photo has large shapes with dark colors, deep shadows, whites and bright sun light.

Linocut
I traced the shapes in the photo to the linoleum using graphite paper.  Then used a sharpe pen to mark all the lines and areas that needed to be carved away.

I used speedball carving tools, starting with the knife to outline shapes to be carved.  The 2V tool was also used to outline, and make medium lines.  The larger 2V and 5U tools were used to remove large amounts of linoleum inside the bigger shapes.  The smaller 1V blade was used to create small precise lines, and the 1V, 2V and 3U shaped blades were used to add texture to the boat hulls and dock.

The finished linocut was inked with a thick dark blue ink and places on the printer bed ink side up.  Paper was carefully placed on top of the linocut.  The bed was slid under the printers roller.  The ink on the linocut adheres to the paper creating a reverse image.  The amount of ink transferred depends on the viscosity of the ink, the amount of ink on the linocut, the type of paper and amount of pressure imparted by the press during printing.  The first print didn't have enough ink or pressure.  I lowered the roller a bit and re-inked the linocut with thinner black ink.  The resulting second print came out much better with sharp lines and smooth consistent areas of color.

First printSecond print
Now that I was done printing, the remaining ink on the Linocut needed to be removed.  You can use several solvents to remove oil based inks, I used vegetable oil.  I applied some vegetable oil and started rubbing with a paper towel, but stopped. There was still a lot of ink on the linocut so I decided to try using a marble rolling pin and paper towels to pull most of the ink off first.  I was very successful at pulling the majority of ink off the linocut.  I finished up by rubbing the remaining ink off with vegetable oil.  Below is the first paper towel rolling pin print, which was interesting enough to keep.  You can see the paper towel pattern, remnants of black and dark blue ink, as well as a lighter circle where I started to remove the ink in the upper left.

Paper towel print


Sunday, March 18, 2018

Printing & Books: Pressure printing

Pressure printing, or stratography, uses a flexible plate and type-high surfaces. The image is transferred with variating amounts of pressure to the sheet of paper.  The resulting image shows a combination of ink density based on the amount of pressure applied to each area.  The printed image is not as clear and sharp as ones made by direct impressions.

horsetail stained paper
The process is an easy and quick way to make an image that is not reversed.  It can also be used to create textures and patterns from paper, fabric, leaves or other thin objects.  I experimented with paper stacks as well as different leaves. 

For my first print I used a combination of stacked paper, dried false papyrus leaves and fresh horsetail stalks.  There was a significant difference in thickness between these objects and as a result some of the print received too much ink and other parts too little ink.   The horsetails, since they was green and not dry, stained the paper green.  The image at the right shows both the stalks and cut stalks that show up as circles. 

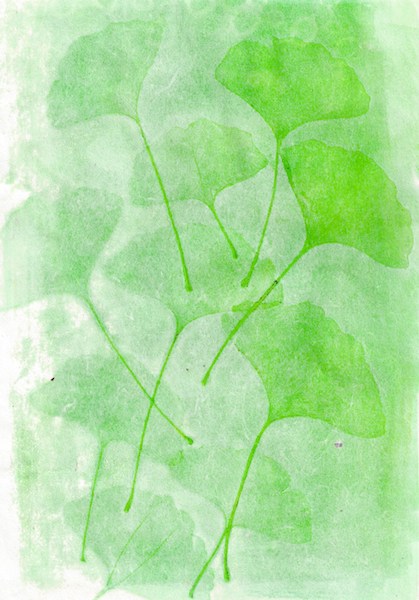
The second print I did using dried ginko leaves and I was able to make a reversed second print.

Sunday, March 4, 2018

Printing & Books: monoprint stencils

Inked stencils (after printing)
In our second class we created a monoprint using stencils.  To create a two color flower print I cut two stencils from card stock.  One stencil represents the flower, with negative space in the center.  The second stencil is of a stem with 3 leaves.  The flower stencil was inked in a pink, and the stem was inked in green. 

We used a floor model printing press to make our prints.

  1. A sheet of paper was placed on the press.  
  2. The stem & leaf stencil was placed ink side down on the paper.
  3. A larger sheet of paper was placed over it all.
  4. The stack was rolled under the press.
  5. The first stencil was removed and the flower stencil was places ink side down on the paper.
  6. The stack was again rolled through the press.
Flower print

The ink from the first printing bled through the ink from the second printing were they overlap.  This could be because the ink from the first printing wasn't dry, or due to the choice of colors.

Using this process you can do multiple printings to create complex prints.

Sunday, February 25, 2018

Printing & Books: Start at the beginning

It was inevitable that after working on an art book that contained text I would start thinking about printing.  Coincidentally I discovered, a "Printing and Book Arts" class offered locally by Katherine Miller, a MFA Candidate in Printmaking & Book Arts at the UGA Lamar Dodd School of Art.  The class included instruction on making various types of prints, and making a simple book.  A perfect fit for me.

Our introduction to printing was to make "direct trace drawings".  The trace monotype process was invented by Paul Gauguin, and has been used by many painters to create prints.  Monoprints and Monotypes are called the "most painterly printmaking process".  I can understand why.  There is a soft beauty to this spontaneous printing process.  Each print is unique, and the printer directly influences the image during the printing process by adding, subtracting and manipulating the print.

Ink drawing
The setup:
  1. Evenly ink a plexiglass plate.  
  2. Place a sheet of thin smooth paper on top of the ink.  
  3. Place a second slightly larger sheet of piece of paper on top of the first sheet.   
Carefully draw an image on the second sheet of paper.  Pressure from the pencil/pen transfers the ink to the middle sheet of paper.

Pressure print
The resulting print is a reverse of the drawing.  So if you want to add text to your print, you will have to learn how to write backwards.

Where I pressed harder when drawing more ink was transferred.  Where lines were close together or crosshatched more ink was transferred.  You can also see smudges of ink where where my hand leaned on the paper while I was drawing.  Fingers or spoons can be used to add texture.