The third trout pattern represents a
Rainbow Trout. These trout have olive-green backs with dark olive to black spots. A bright pink stripe of color splashes along the mid-line of the body, fading to white on the abdomen. The small clear scales of the fish produce an iridescence where the light reflects off of them, which I represented by
lifting off some of the paint.
I was satisfied with the
Brown and Rainbow Trout patterns I had painted, but the Brook Trout pattern didn't look quite correct. After looking at several photos of
Brook Trout I realized what fly fishers refer to as a "worm" pattern on the back and upper sides of the trout resembles patterns seen in
some corals. Also the spots and vermiculate pattern were actually yellow, not white or light olive color which lifting the wet paint had created in previous paintings. To achieve the pattern seen on the fish in the photos I needed to use a different painting techniques then I had been using so far.
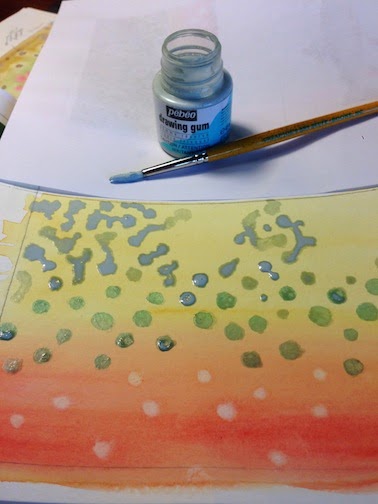
The first step was to lay down a
blended wash of Aureolin Yellow across the top of the paper and Cadmium Red Light along the bottom. The colors join and mix just below the middle of the page. Before the paint dried I created several "white" spots in the middle and lower half of the painting by
lifting off the wet paint. After the paint dried I added a little Winsor Blue to the "white" spots in the middle to create the halos for the red spots I would add later.
Next I used
masking fluid to cover the blue spots in the middle. I then added additional masking to the upper part of the painting to create the "vermiculate and spot" pattern trout exhibit on their back and upper sides. In the photo to the left I had already covered the blue spots and was half way through adding additional masking to finish the trout's upper pattern.
Once the masking had completely dried I wet the upper part of the paper using a light mist of clean water. I added a
graded wash composed of a mixture of Sap Green, Burnt Siena and Raw Umber to create the olive-green and brown of the trout's back and upper sides. Once the final wash was dry I removed the masking to reveal the lighter spots and "worm" pattern. The photo to the right was taken when I was halfway through removing the masking.
Masking fluid creates a sharp edge where the pigment of the wash could not penetrate the paper. I softened these edges by adding clean water and lightly rubbing the edges. The step was to use Rose Madder to add small red spots in the center of the light blue spots. To the right is a photo of the finished painting.


No comments:
Post a Comment