Saturday, December 9, 2023

Books with cross stitch covers

I have several small counted cross stitches my Mother started but didn't finish.  I decided to finish them but wasn't sure how to use the.  Then I saw a facebook post by Bep van Gasteren who uses counted cross stitch on the covers of her books.  

I followed her post to make a small book with a counted cross stitch butterfly on the cover.  Below are all the pieces for the book:


I prepared the book cover:  Cutting a hole in the center of the front cover.  Attaching the reinforced counted cross stitch.  Punching the spine.   


I prepared the book pages:  Cutting the paper.  Folding the signatures.  Cutting front and back signature covers.  Punching the six Signatures using 2 guides.


I assembled the book using Keith Smith "arrow" binding for 3 signatures.


I am happy with how this first little book turned out.  


Sunday, September 24, 2023

Making large photo albums

A friend asked me to make a photo album for a gift.  I have made small photo albums before and so I was happy to make a larger one for him.  Once we started talking about what was going in the album (30 stories written on 8.5" x 11" paper) I realized it would need to be a very large photo album.

I started by determining the album pages would need to be 12" x 12".  This would allow a margin around the papers that would be attached to the pages.  It is also a  standard size so I was able to purchase the pages.  I then needed to determine the size of the book cloth and decorative paper needed to cover the book board.  Once I had the dimensions I was able to order the materials I needed.  

Cutting the materials:

  • 4 book board pieces (2 for the back and 2 for the front). 
  • 4 book cloth pieces 2 for the back and 2 for the front). 
  • 4 decorative exterior paper pieces (2 for the back and 2 for the front)  
  • 2 decorative interior paper pieces (1 for the back and 1 for the front). 

NOTE: It is important to mark front vs back and top vs bottom so you can punch and assemble the pieces without any misalignments.

I made a 3 hole template for punching the book board spine pieces, and punched them.  

Before gluing the paper and cloth to the book boards, I checked to be sure they were the correct sizes so everything would fit together correctly.

I began by gluing the book cloth onto the outside of the back and front book board pieces.  The corners were cut and the book cloth edges wrapped around and glued to the interior of the book boards.  The 2 smaller pieces of book cloth were glued over the spine on the inside, covering some of the exterior book cloth edges.  The 3 holes now covered by the book cloth were carefully re-punched. 

Next the decorative paper was glued to the outside of the front and back book board.  The corners were cut and the paper edges wrapped around and glued to the interior of the book boards.  

Finally the 2 large decorative interior pieces of paper were glued in place, covering the remaining edges of book cloth and exterior decorative paper.

I made a second 3 hole punch template with a narrower margin along one edge to use with the 30 book pages and 31 spacers.  This moves the edge of the pages away from the spine edge of the book.  After punching the 61 pieces I assembled the book.  

I actually made two books, so my friend would have a choice of colors.


Friday, April 14, 2023

Abstraction through Design workshop

I participated in a three day abstract watercolor workshop lead by John Salminen

I am not an abstract painter, but over the course of the workshop I discovered that thinking about what makes an abstract painting is interesting can help make more interesting paintings.  Without a defined subject it is the elements of the painting that make it interesting.  The play of colors, dark against light, warm against cold, lines against shapes.

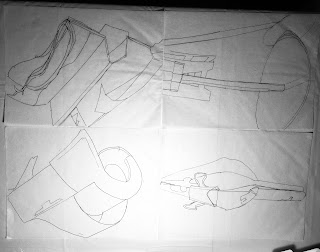
We went through a process of creating a very busy line drawing of random shapes. 

Then we used the lines to help us create a painting with a three armed white object, more or less in the center of the paper, bounded by color.  

The next step was to add some black shapes to define some contracting edges.  Then additional warm and cold colors were added to create interest and movement.  Once I started painting it became easier to add more colors to the painting.

The final shapes we added were cut from magazines and applied to the painting using matte media.  The resulting paintings were very interesting.  This was the hardest part for me.  It took a long time to find items to use and to decide where to add them.  I'm still not sure it is done.

Tuesday, March 14, 2023

Little bound story book

I purchased a stuffed Ossabaw Sicilian donkey for my nephew.  He is quite a Winnie the Pooh fan, so I decided to also get him a stuffed Eeyore, and to make a little book about the two of them meeting.  

After roughing out a story,  I had an idea of how many illustrations were needed.  I started working on sketches,   Over time, a rough story and illustrations slowly converged into what could be a little story book.  

It would have 8 pages.  I would need 10 illustrations: front cover, front page, 6 for the story, back page and back cover; and the text needed to fit in the available space of the 6 story pages.

I used watercolor paper for the 4 signatures (8 pages) of the book.  The illustrations were inked and painted.  Then text was added to the pages.  Finally I sealed the pages with a non-toxic watercolor sealant.  Finally I was ready to put together the little story book.  

 Punching the covers
Last page and inside of back cover
Bound book


Tuesday, February 14, 2023

Victorian Folded Valentines

There was a time when people gave folded valentines, with hidden messages inside.

I recently made some of my own to give as gifts to friends.  The folding is like similar to Origami, but with a twist.  Because I was including drawings and text, I needed to figure out where to put them on the paper before it is folded.  I started by learning the steps of folding.  Once I could fold it successfully, I determined what parts of the paper would be visible at each stage of the unfolding.  Then with the paper totally unfolded I worked out the drawings and text for each side.  After a few false starts I had a mockup to use to make the final valentines.  

Folded valentine           
Opening first fold          
Opening second fold.   
Opening third fold          
Opening fourth fold        
Untwisting the corners    
Inside of unfolded paper  
Outside of unfolded paper
I put them in little envelopes

Friday, February 3, 2023

REpurposed books

Our local library has a book sale twice a year.  I Usually help either setting up for the sale, or boxing up the the unsold books after the sale.  I always find a few books to bring home and repurpose as journals.  I choose books with interesting covers.  Some of the books also have pages with poetry, illustrations or photos that can be use as signature covers, or to line the inside of the journal covers. 

I start by breaking down the books.  Carefully removing the text block from the book.  If the spine of the book is not in good condition, it will not be reused.  

For most of the books, both the covers and spine are reused.  Book cloth and sometimes book board are used to reinforce the spine.  Signatures are created to fit the repurposed covers.  Templates are made and the spine and signatures are punched.  Then its time to reassemble the parts into a journal.  There are many different binding patterns that can be used, and I've enjoyed trying several new ones while making these repurposed books.  


If the spine is so damaged it can not be reused, it is cut in half then folded and glued to the inside of the covers.  These covered boards are used to make coptic bound journals.  I typically use 5 signatures of the appropriate size for each journal.  There are a few ways to sew a coptic binding.  There are methods that use two needles, and others that use only one needle.  Some patterns bind the text block together first using long or french stitch, and then attach the covers using a coptic stitch. thers bind the covers and text block at the same time using a coptic stitch.  In the event the covers are damaged, I recover the book boards with decorative paper and the edges of the spine with book cloth for reinforcement.